Sanding your floor can be a moderately difficult task but also one that reinvigorates even some of the most weathered floors. Here are the 7 steps you need to take to sand your floors:
1) Gather the equipment
For this particular task you will need some very specific equipment for this task. Renting both a floor sander and an edge sander will come in handy. You will also need sandpaper for both of them in three different ranges – 36 grit, 50-60 grit and 80-100 grit. A scraper will help you get into the corners where neither an edge or floor sander and reach.
2) Set it all up
When sanding the floor of a particular room, be sure to isolate it with a plastic drop cloth and tape. If you don’t, the saw dust will circulate all over your house. Before you start, make sure that you have a dust mask to protect you from the circulating saw dust and ear plugs for the noise. It’s also important that there aren’t any loose nails sticking up.
3) Start floor sanding
Start off with the drum sander and apply the 36-grit sandpaper. Make sure that before you start it that the sandpaper isn’t touching the ground. The sandpaper must always be moving or you will leave grooves in your floor. Another important aspect is to always go with the grain of the wood. Start in a corner and go in a row until you reach the end and keep repeating in rows until you reach the end of the floor. When you see finish isn’t coming off anymore, change the sandpaper. If you need to stop moving the machine, be sure to move the lever to the up position so you don’t leave any grooves.
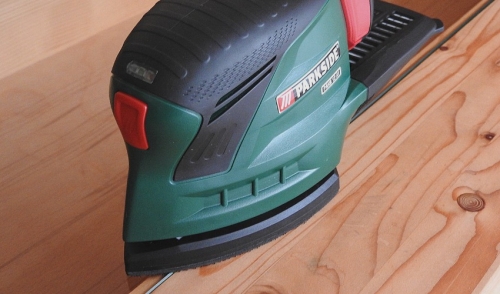
4) Edge sanding
You will want to do the same thing with the edge sander that the drum sander couldn’t reach. Put on the 36-grit paper and sand the perimeter of the room. Do not put the entire machine’s weight on the floor or you will leave scuff marks.
5) Repeat steps 3 & 4 with medium-grit sandpaper
Now that you finished with the drum sander and the edger, load the 50-60 grit sandpaper on and repeat steps 3 & 4 in consecutive order.
6) Get to the corners, fill in the holes
Using the drum or edge sander likely didn’t get to the corners so you will have to most likely sand them by hand. After you are done with that, clear the room by vacuuming up the dust. Look for any imperfections such as holes or scratches and fill them in with wood putty. Let it dry for an hour and don’t let anyone walk on the floor in the meantime.
7) Just one more time
Once again you will want to repeat steps 3 & 4 with the fine-grit 80-100 sandpaper. Sand the corners by hand down to the same level. Make sure to thoroughly vacuum up the floor when you are all finished. When everything is all clear you may want to consider staining it and definitely putting on a finish.

Comments